Unlock the enchantment of outdoor pizza cooking with confidence through the art of Ooni Fyra lighting. There’s something magical about gathering outdoors with family and friends, savoring the aroma of freshly baked pizza, and relishing that perfect slice of goodness.
If you’re a pizza enthusiast, the Ooni Fyra pizza oven is undoubtedly a game-changer in the world of outdoor cooking. But before you start whipping up those delicious pies, it’s essential to master the art of lighting your Ooni Fyra properly. In this post, we’ll walk you through everything you need to know about Ooni Fyra lighting for the best pizza cooking experience.
Understanding the Ooni Fyra Pizza Oven
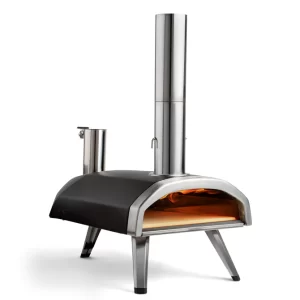
Before we delve into the lighting process, let’s familiarize ourselves with the Ooni Fyra pizza oven. Known for its portability and ease of use, the Ooni Fyra is a compact, wood-fired pizza oven designed to deliver mouthwatering pizzas in a matter of minutes.
Its stainless steel construction ensures efficient heat retention, while the custom-designed cordierite stone floor guarantees a perfect crust every time. Whether you’re a seasoned chef or a novice home cook, the Ooni Fyra opens up a world of possibilities for crafting restaurant-quality pizzas in your backyard.
Importance of Proper Lighting
You might be wondering, why is proper lighting so crucial when using the Ooni Fyra? Well, the way you light your pizza oven sets the foundation for the entire cooking process.
Proper lighting ensures an even distribution of heat throughout the oven, allowing your pizza to cook evenly and develop that irresistible crispy crust. On the other hand, inadequate lighting can lead to inconsistent temperatures and an unsatisfactory pizza experience.
Preparing for Lighting
Before you embark on your pizza-making journey, take a few moments to prepare your Ooni Fyra for lighting. Start by cleaning the oven, ensuring there’s no debris or ash left from previous use.
Inspect the oven for any damage or blockages that might impede airflow. Once you’re satisfied with its condition, assemble all the necessary components, such as wood pellets, kindling, or charcoal, depending on your preferred lighting method.
Lighting Methods
The Ooni Fyra offers multiple lighting methods, allowing you to choose the one that suits your preference and convenience.
Traditional Wood Pellet Method:
- Fill the hopper with wood pellets.
- Create a small opening at the front of the hopper, enabling airflow.
- Insert a fire starter or a few lit wood pellets into the opening.
- Wait for the pellets to catch fire and add more pellets gradually.
Kindling and Charcoal Method:
- Place a small amount of crumpled paper or fire starter at the bottom of the oven.
- Arrange a layer of kindling on top of the paper.
- Add a few pieces of charcoal on top of the kindling.
- Light the paper, and the fire will gradually spread to the kindling and charcoal.
Step-by-Step Lighting Process
Now that you know the different lighting methods let’s go through a general step-by-step guide to lighting the Ooni Fyra using the wood pellet method:
- Open the hopper door and fill it with wood pellets, ensuring they are evenly distributed.
- Create a small opening at the front of the hopper to allow airflow.
- Insert a fire starter or a few lit wood pellets into the opening to ignite the pellets inside the hopper.
- Wait for the pellets to catch fire and produce a flame.
- Gradually add more wood pellets to maintain a steady flame and build up the heat.
- Monitor the temperature using the Ooni Infrared Thermometer or the built-in thermometer on the Ooni Fyra.
- Once the oven reaches the desired cooking temperature (usually between 750°F to 900°F), you’re ready to cook your pizzas!
Troubleshooting
Despite your best efforts, you might encounter a few challenges during the lighting process. If you experience difficulty in lighting the oven or maintaining a steady flame, here are some troubleshooting tips:
- Ensure proper airflow by clearing any blockages in the hopper opening or chimney.
- Check for adequate ventilation around the oven to prevent air from being drawn away from the flame.
- If using wood pellets, make sure they are dry and stored in a dry place to facilitate easy ignition.
Tips for Successful Pizza Cooking
Now that your Ooni Fyra is beautifully lit and ready to go, here are some additional tips for making the most of your pizza cooking experience:
- Use high-quality ingredients for the best flavor.
- Experiment with different pizza dough recipes to find your favorite.
- Preheat the stone floor for about 15-20 minutes before placing your pizza inside.
- Rotate the pizza regularly for even cooking.
- Invest in a pizza peel for easy and safe pizza transfer.
Cleaning and Maintenance
After you’ve enjoyed your delicious pizzas, it’s essential to clean and maintain your Ooni Fyra for long-lasting performance. Allow the oven to cool down completely before cleaning. Remove any ash or debris from the hopper and oven floor, ensuring proper airflow for the next use. Store your Ooni Fyra in a dry and protected area to prevent exposure to the elements.

Conclusion
Mastering the art of lighting your Ooni Fyra is the key to unlocking a world of delicious outdoor pizza experiences. By following the proper lighting techniques and tips provided in this guide, you’ll be well on your way to crafting perfect pizzas that will impress family and friends alike. So, fire up your Ooni Fyra, embrace the joy of pizza making, and savor every slice!
Remember, the journey to pizza perfection is a continuous adventure, so don’t be afraid to experiment and make it your own. Enjoy the process, and happy pizza baking!